Colors are added to your DX Engine site in a few steps. For those brand new to web design, that may sound more complicated than necessary. However, setting colors this way allows for consistency on every page and super easy, super efficient adjusting later on.
Colors are set using the following steps:
- Define your company colors in the Brand.
- Assign those colors to different elements in the Theme.
Defining Your Colors in the Brand
Click Structure > Brands in the menu to access the Manage Brands section.
Once in Manage Brands, you have two options:
- To start a new brand, click the + Build a Brand button.
- To edit an existing brand, click Edit next to the brand you want to update.
Starting a New Brand
After clicking + Build a Brand, you will arrive at the new brand template.
Enter a name for your brand in the Brand Name field at the top (this is required).
Next, you can define the colors in your brand using the dropdowns. You can define up to 5 colors for your brand in order of prominence in your brand identity (primary, secondary, tertiary, quaternary, and quinary).
To set a color, simply click a dropdown to expand it. Enter the hexcode of your brand color in the textbox, then press Enter to select the color.
If you prefer, you can also use the interface to select a color from the spectrum on the right, then brightness/saturation from the larger area on the left.
Simply click anywhere outside the dropdown to proceed with that color selected.
Editing an Existing Brand
Editing your brand colors works very similar to setting them up for the first time: each color is shown in a dropdown that can be clicked and a new color can be entered or selected to replace it (review Starting a New Brand above to see examples of these actions).
You will notice that there are many more than the 5 color dropdowns from the initial brand setup. These new colors are different shades of your original colors that DXE has automatically generated. By expanding your color palette in this way, you can create a more dynamic and visually interesting site while still staying within brand guidelines.
Assigning Brand Colors in the Theme
To access your theme settings, click Theme in the DXE menu at the top of the screen.
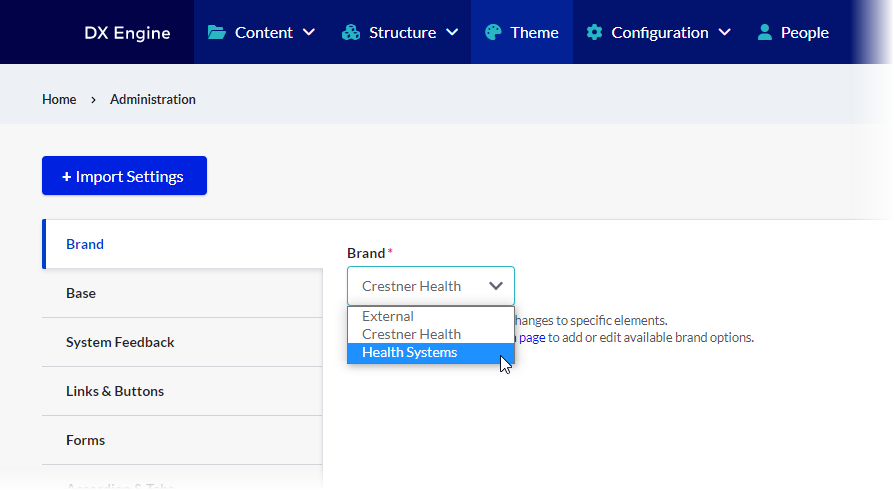
You will begin on the Brand tab. Here, click the dropdown and select the brand you have established before. This will populate all of the settings established in the brand (including the color scheme).
Proceed through each of the tabs on the left to customize their elements. When you have the option to set an element’s color, you can click the dropdown and select a color/shade from the list of colors you defined in your brand.
Wherever you use the element in your site, it will be the color you have selected here. Click Save Configuration at the bottom of the Theme page to save your updates.
For more details about working with themes, please view our Theme page.
Performing a Site-wide Brand/Color Update
If you have an established site but need to perform a brand update, DXE makes this trivially easy. By now, you’ve already learned everything you need to know to make this happen.
First, start a new brand. You can define your new brand colors, fonts and all other relevant settings. Your site will remain visible and functional with your current brand in the meantime.
When you are ready to make the switch, enter your theme settings. On the Brand tab, click the dropdown and select your new brand. Each variable set in the current theme will update to the corresponding new value. For example, any color that was set to “Primary Color 50” in the current theme will update to the color you defined as “Primary Color 50” in your new brand. The changes are not live yet, so you can take your time reviewing all of the tabs and make adjustments if you like.
After confirming everything is set to your liking, scroll down and click Save Configuration. Your new brand will go live immediately, and all your current content will display with your new brand settings.
Related Help Content
 DXE: Adding content
How-to: Bulk edit content
When you need to make extensive updates—such as refreshing provider bios or location details—the bulk...
DXE: Builder basics
Reference: Global search tab
OverviewThe Global Search tab in Theme settings allows you to set how global search bar components behave...
DXE: Getting started
Log into DXE
To access DXE for your health system websites, just add /user to the base URL. For example, if your websi...
DXE: Adding content
How-to: Use CDN Asset Injector
OverviewThe CDN (“Content Delivery Network”) Asset Injector lets you connect CSS or JavaScript assets...
DXE: Adding content
Listing Grid
SummaryThe Listing Grid component allows for the display of a group of related content in a grid-based la...
DXE: Adding content
Posts
A "post" is one of the content types you can add to your website. In general, it is best used to hold inf...