Summary
With marquee carousels, you can easily create an automatic or user-controllable slideshow of images and/or text and place it in your enhanced layout pages. Marquee carousels are an excellent way to engage your site visitors with interactive elements and visuals to strengthen your messaging.

Details
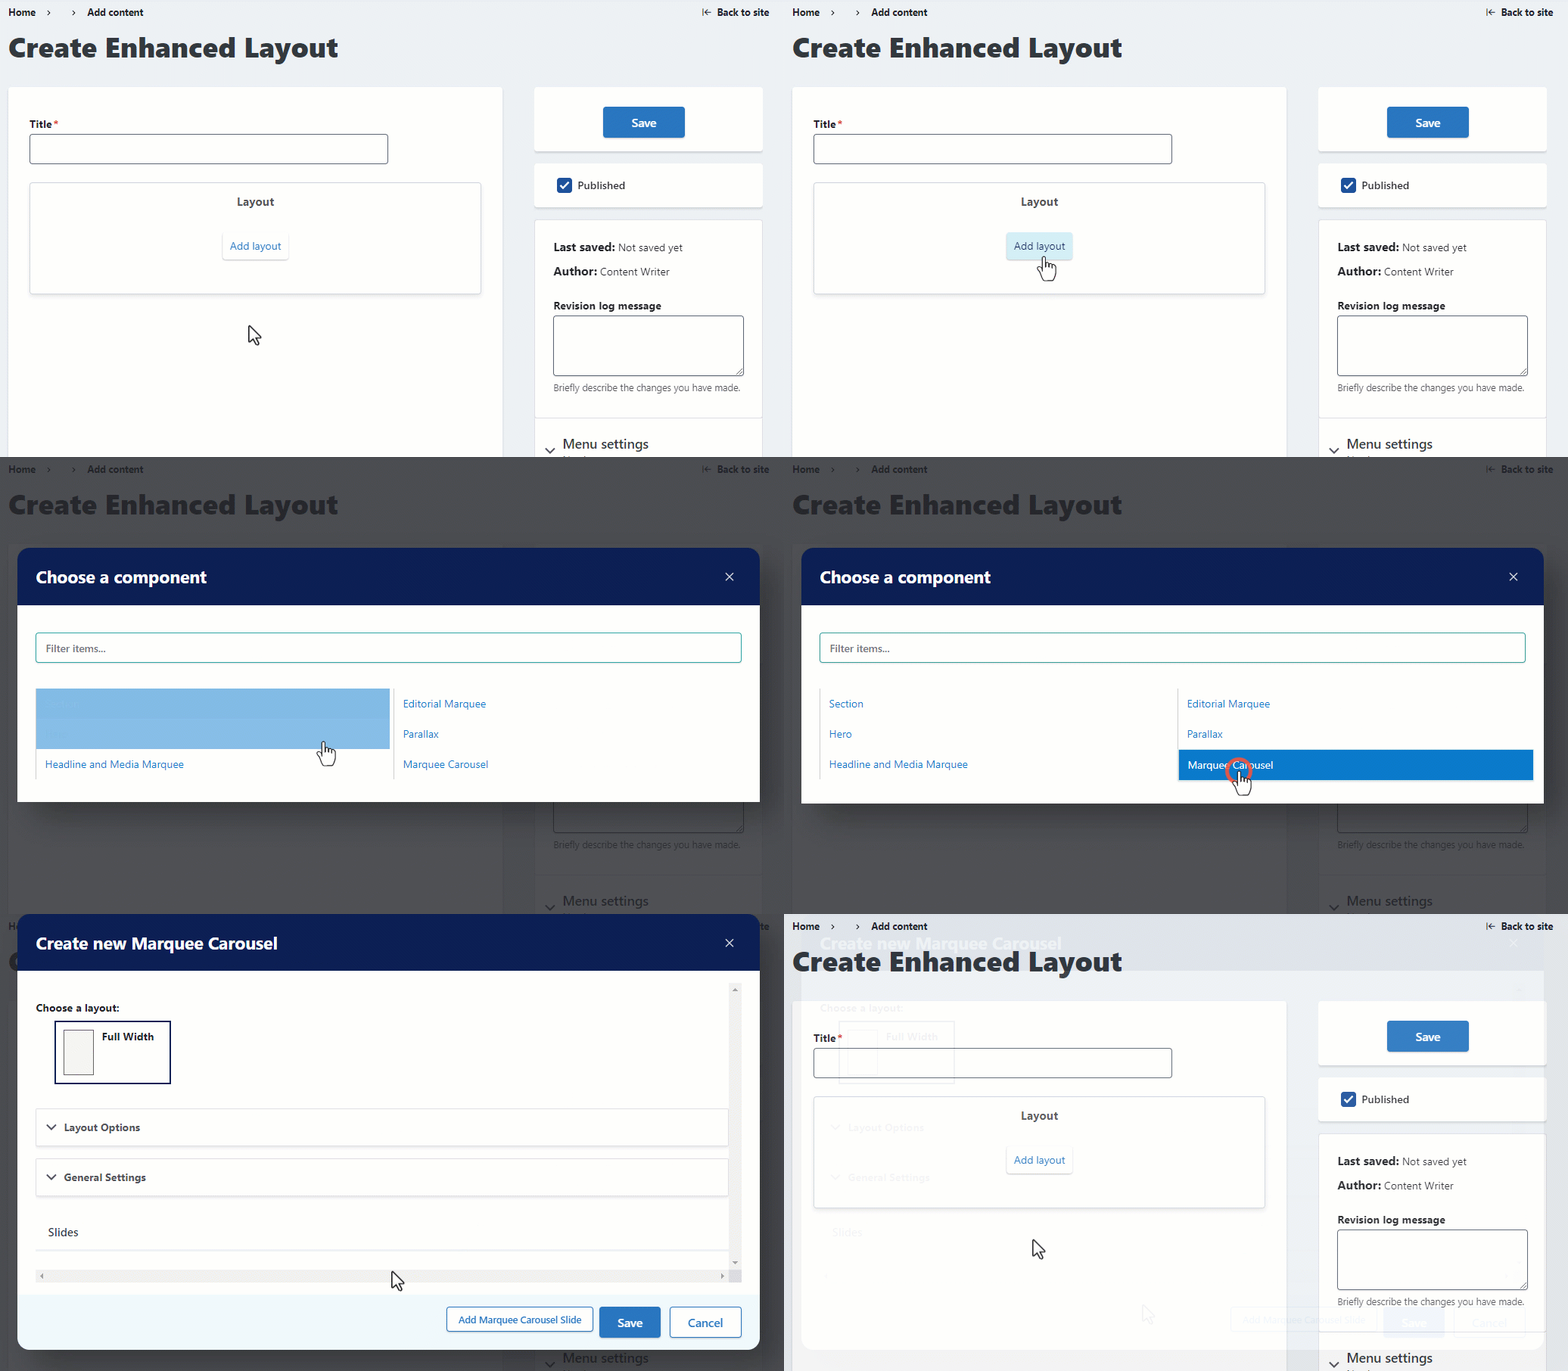
To add a marquee carousel, click Add layout in a blank section on your page, then select Marquee Carousel.

Marquee carousel general settings
You can set the following global options when creating a marquee carousel:
- Desktop Height: Set a minimum height for the Marquee Carousel when viewing the component at desktop display widths. Value is expressed in pixels (i.e. 600px)
- Mobile Height: Set a minimum height for the Marquee Carousel when viewing the component at smaller display widths. Value is expressed in pixels (i.e. 300px)
- Background Color
- Autoplay Interval: Enter an interval speed (in milliseconds) to enable automatic playback of the carousel slides (must be greater than or equal to 1000).
- Pause: Enable the marquee carousel to pause on hover; works best when autoplay setting is enabled.
- Animation Duration: Duration of the marquee carousel animation in milliseconds.
- Animation Timing: Easing function for the marquee carousel animation. Options are linear (constant speed), ease (natural acceleration / deceleration), ease-in, ease-out, and ease-in-out.
Adding slides to the carousel
To add a slide, click the Add Marquee Carousel Slide button.

You can modify the following options at the slide level:
- Settings: This dropdown contains options for adding/configuring an optional overlay to appear over the slide background image.
- Vertical Alignment: Sets how the included text/images are aligned within the slide (top, center, or bottom)
- Reverse on mobile: Checkbox checked indicates that the left & right hand content columns should be reversed for mobile display widths.
- Shrink Column Width: Reduce content column width to 50% of the slide container. Tip: Apply this setting when adding a slide that only contains a single column of content (image or text).
- Background image: Set an optional background image for the slide.
Adding text and/or image to a slide
After adding a carousel slide, two new buttons appear. Click either Add Image or Add Text to add either to the slide:

After adding a text box, you can enter the text you would like to display. You can use the same text toolbox you use when writing content in posts or pages.
After adding an image, you can set the following options:
- Full Width: Allow image to scale to the full width of the parent container.
- Image Border: Apply border around image.
- Rounded Image: Apply a rounded edge around the image.
- Shadow: Apply a drop shadow to the image.
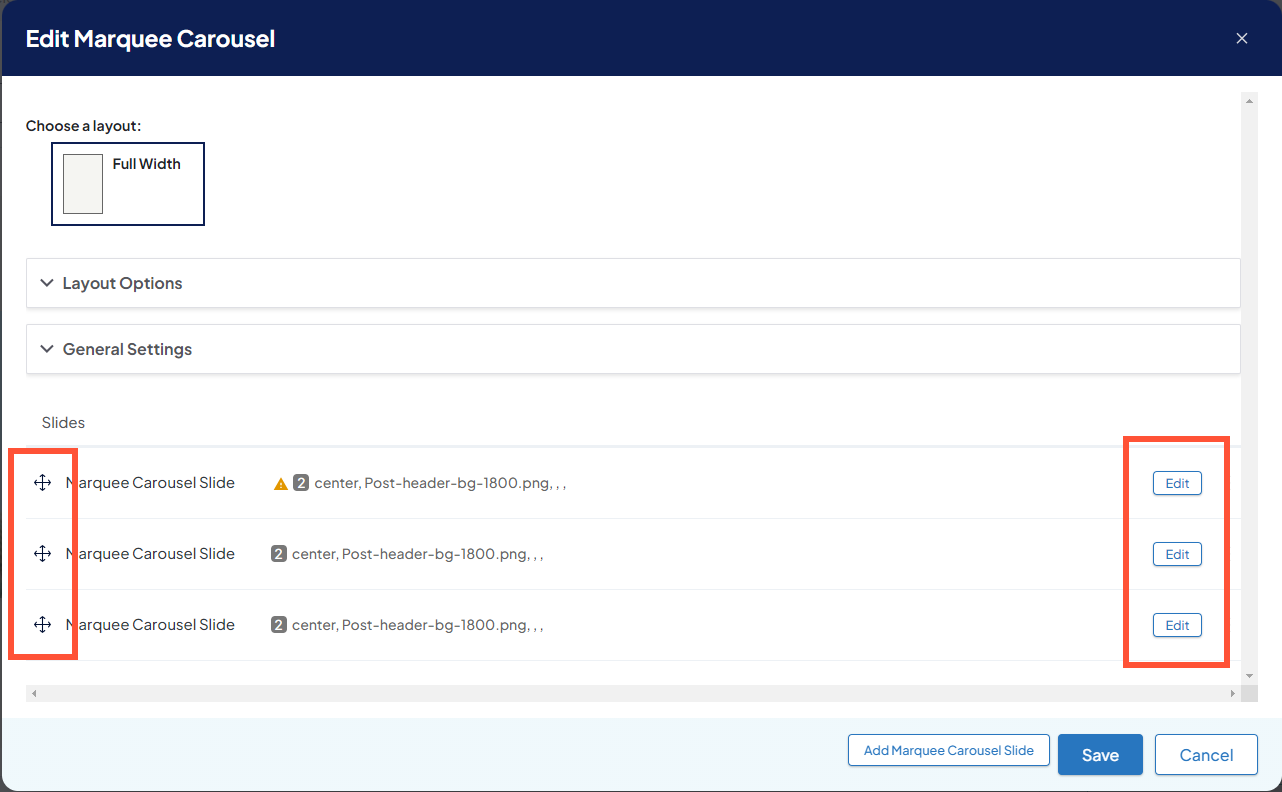
By default, the content added first will appear on the left side of the slide. You can re-order the content by clicking and dragging their directional arrow icons.

When finished with a slide, click the Collapse button at the top of the slide options to close the slide pane.

Editing/Reordering slides
To edit the contents of a slide, click the Edit button next to the slide. To reorder slides, you can drag them around by their directional arrow icons as demonstrated before.

Click Save to save your changes to the marquee carousel. Remember that you also have to Save the page to publish the new version of the carousel!

