Building a site in DXE works best when following a workflow. Although any step can be visited and adjusted at any time, learning to think and build in the order suggested this article will help get the best results.
- Brand (build and apply): happens during setup
- Theme
- Component Library
- Content types
- Blocks
Brand
A "brand" is where you define the following for your site:
- Complete color palette
- Both for your brand and for standard error/warning/success messaging
- Fonts
- Logos and Fav icon
- Contact information
Think of the brand definitions as the most fundamental building blocks for your site. Everything defined here will be used later in the process.
You can define and store multiple brands in DXE. This makes any potential rebranding process much easier by allowing you time to refine all the elements in your new brand offline. When it’s time to switch, simply apply the new brand and your entire site is updated all at once. You can then discard the older brand if desired.
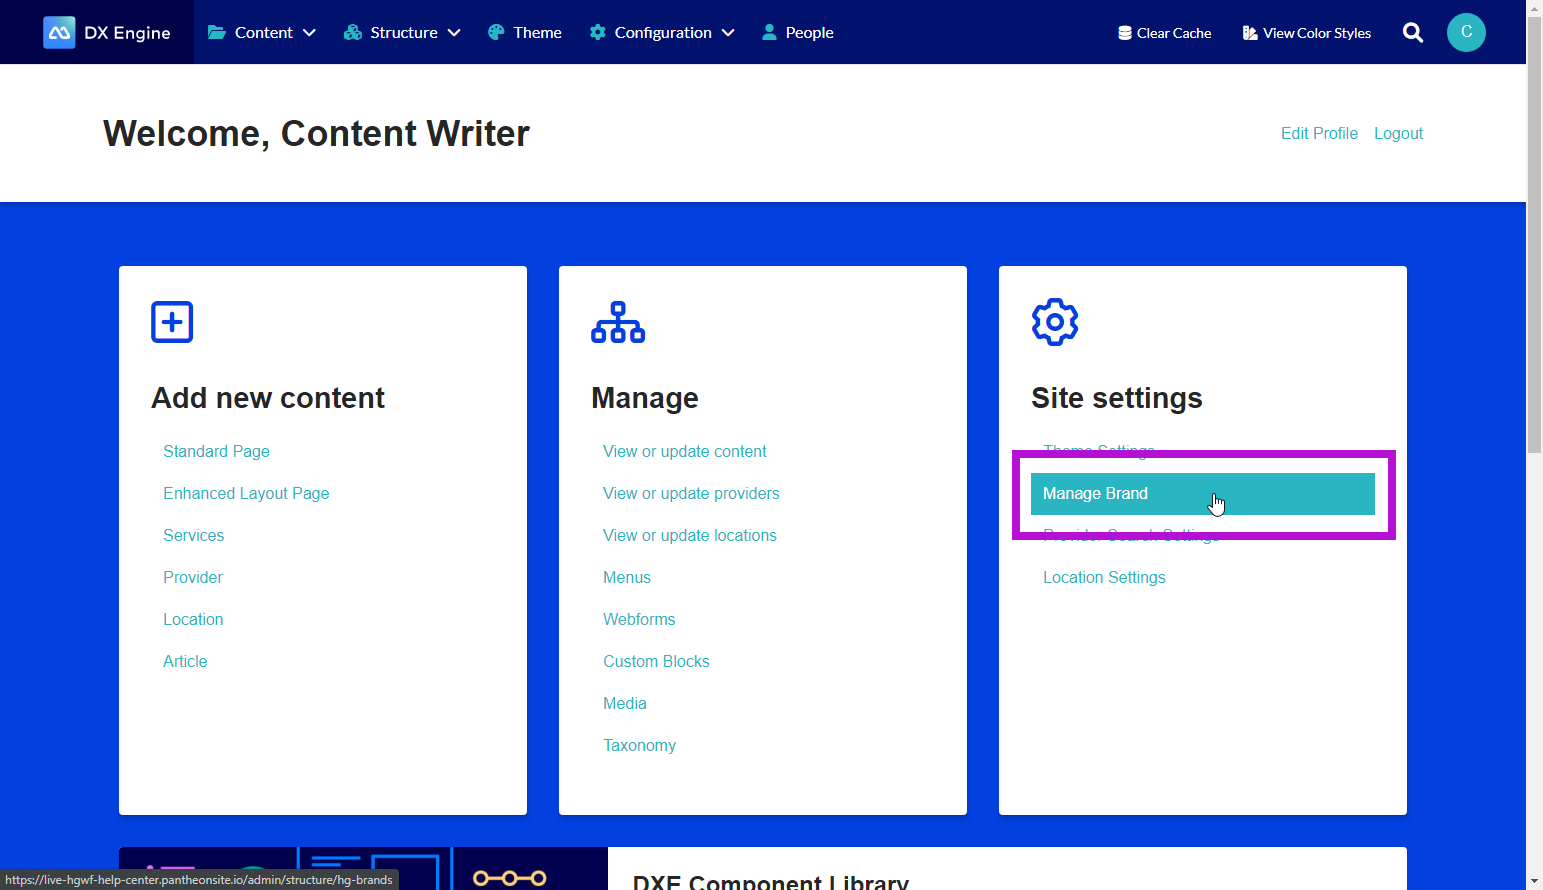
Click Manage Brand under Site settings in the user dashboard.
You will see a list of the brands in your DXE account along with some buttons:
- Click + Build a Brand to start creating a new brand.
- Click + Copy a Brand to copy a current brand and use it as a starting point for a new brand.
- Click Edit next to a brand to edit a current brand.
When clicking the dropdown next to a brand in the list, some new options appear:
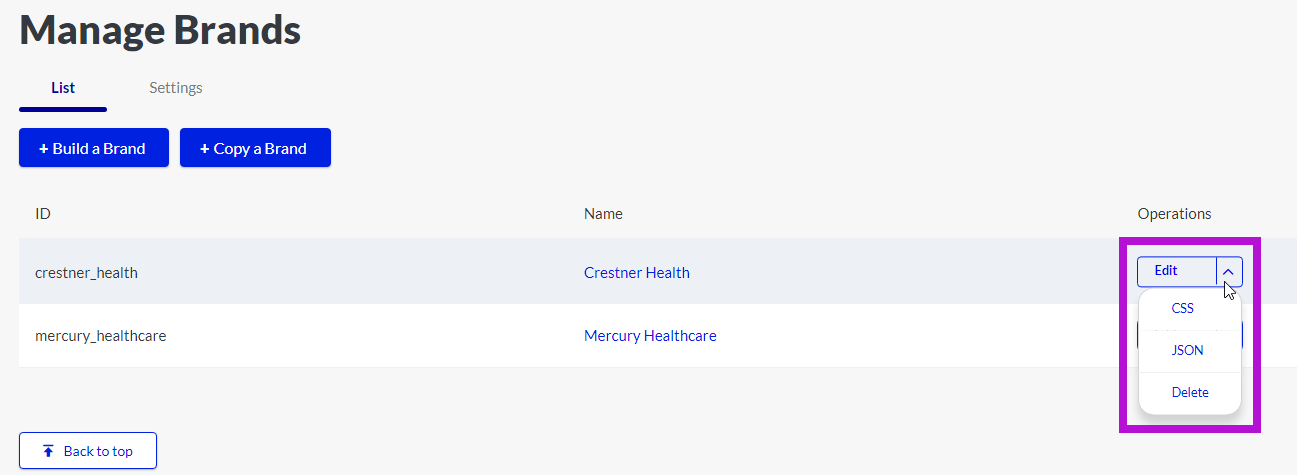
- Click CSS to view the CSS code generated by your brand definitions. This view is not editable; the code will update automatically as you update your brand.
- Click JSON to view the JSON code generated by your brand definitions. This view is not editable; the code will update automatically as you update your brand.
- Click Delete to delete the brand. If selected and confirmed, the brand and all of its settings will be deleted instantly and permanently, so please be very sure before proceeding.
Defining your Brand
Creating/editing a brand is done through an intuitive mouse-click interface. Zero coding knowledge required.
All customizable options are organized into intuitive categories. Click into the option you want to edit, then set your desired formatting. Click anywhere outside that field to retain your new value.
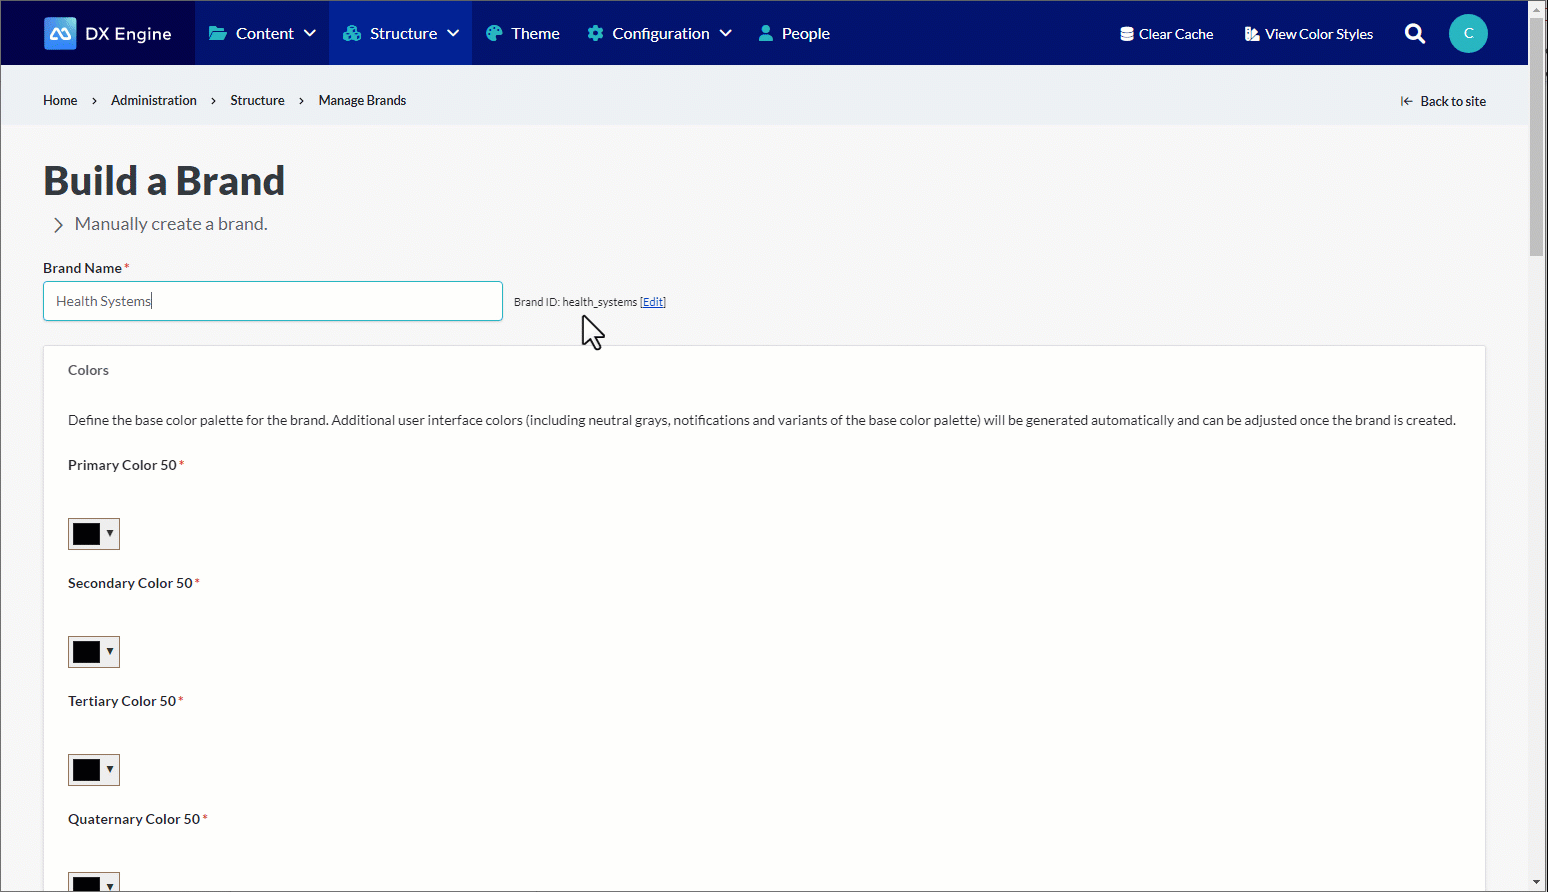
When finished with all brand settings, scroll to the bottom and click Build.