Summary
The Listing Grid component allows for the display of a group of related content in a grid-based layout. It’s similar to a DXE Content Feed, but can be placed and managed on an individual page (or “node”).
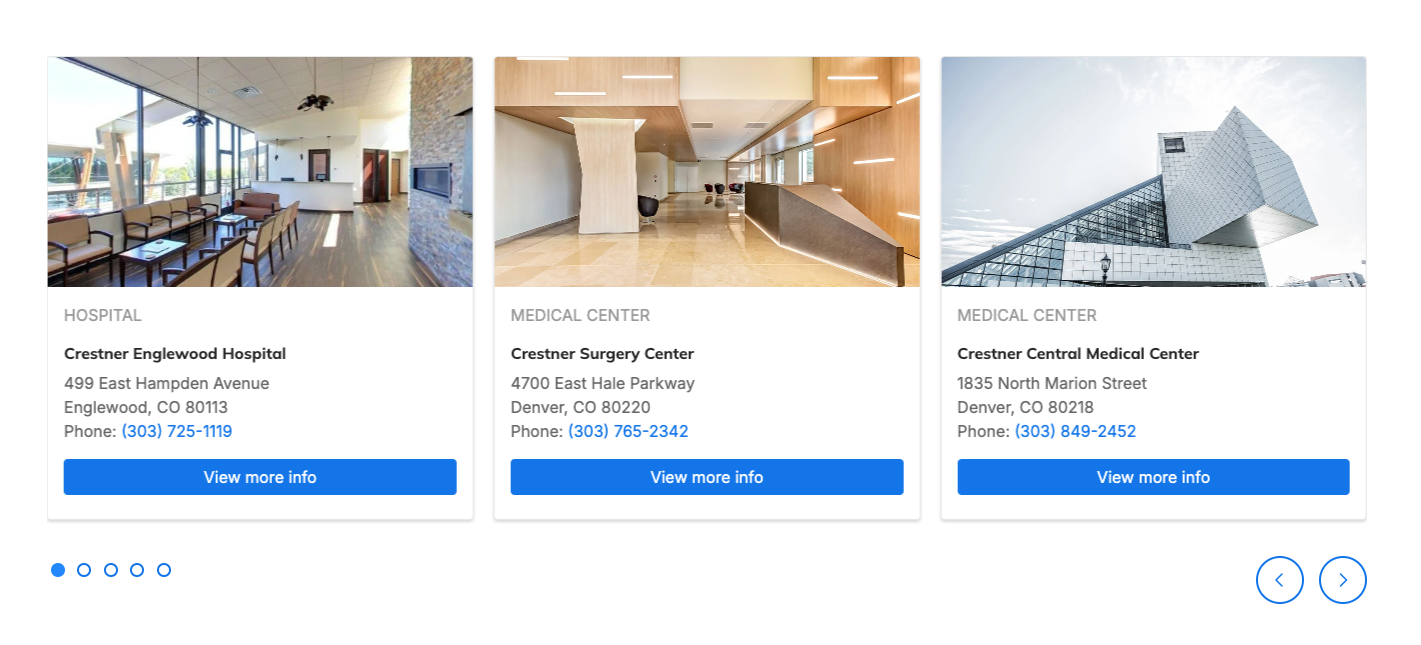
For example, you can place a listing grid featuring a group of specific locations on a single service line page:

Add a Listing Grid
The Listing Grid can be placed inside any Layout region.
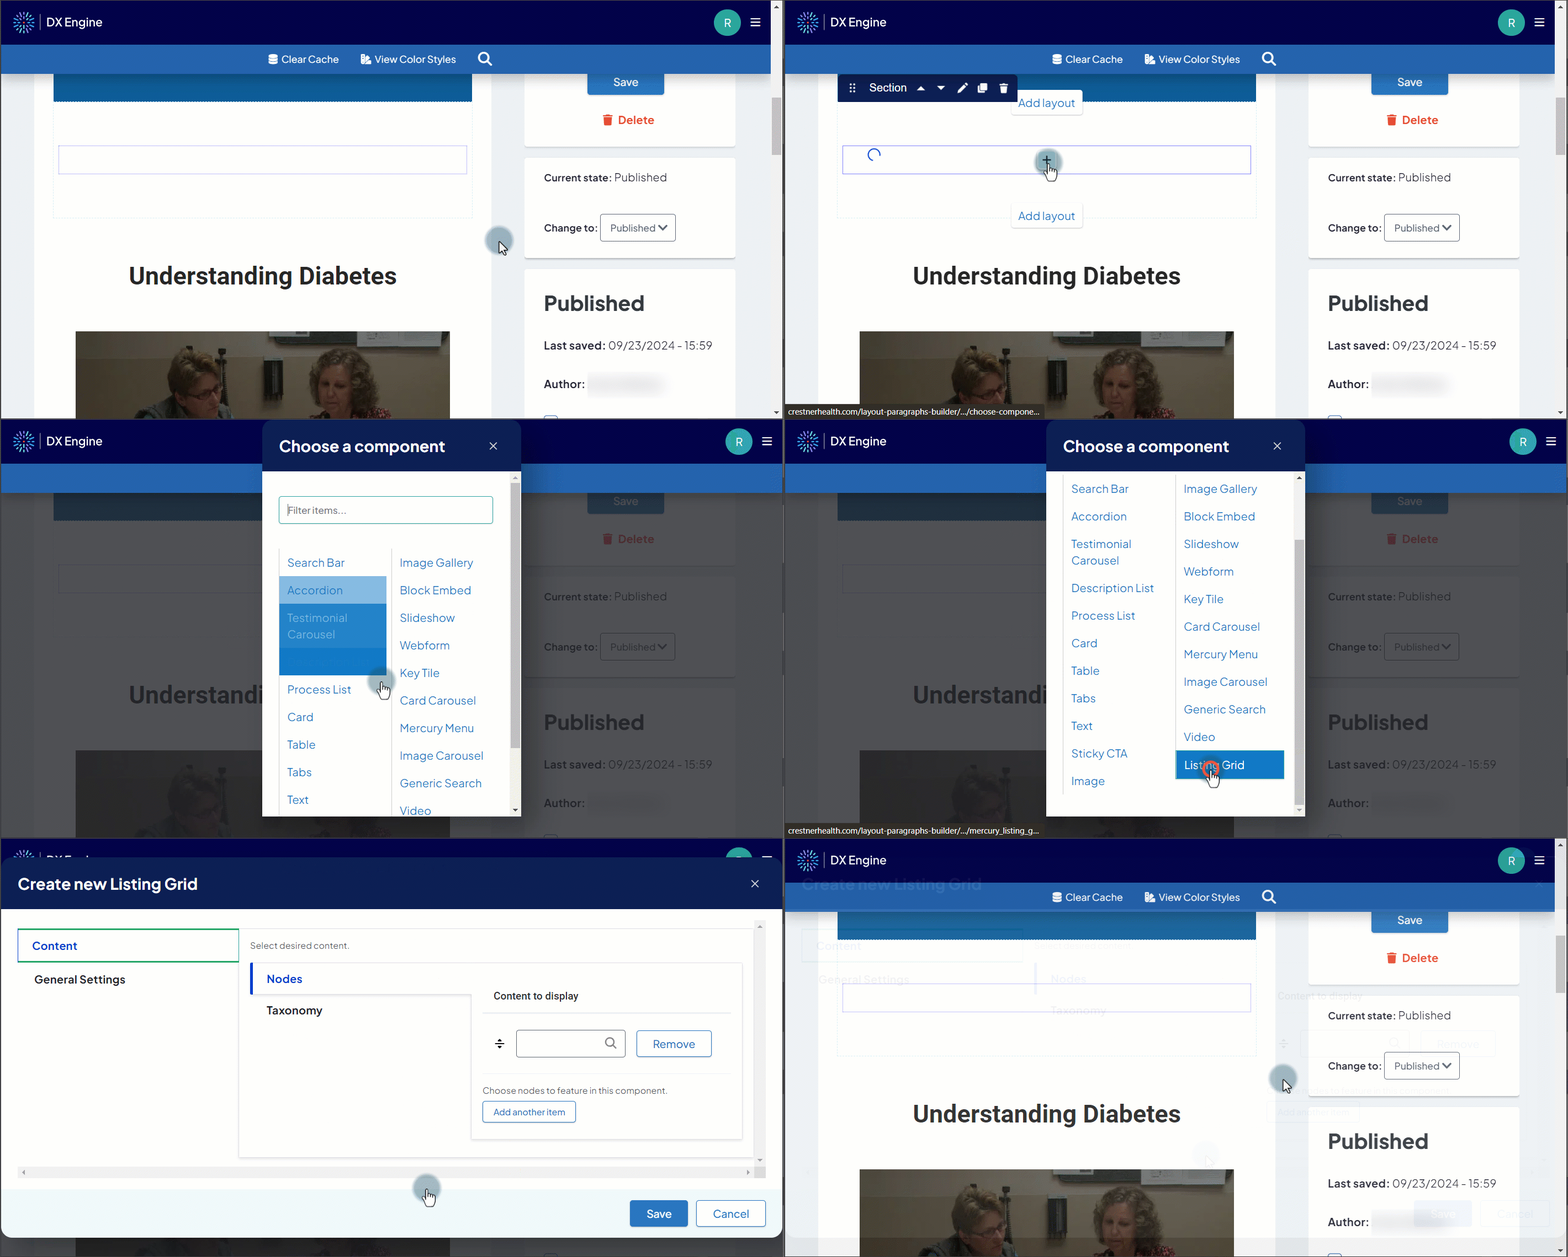
- Create a Layout (or use an existing one) and click the + button in one of the regions.
- In the Choose component window, click Listing Grid.

Add content to the Listing Grid
There are two ways to populate the Listing Grid:
- Nodes: You can manually select which pages (“nodes”) will appear in the Listing Grid carousel:
-OR- - Taxonomy: You can select one HealthHub taxonomy term, and any content tagged with that taxonomy will appear in the Listing Grid. Any changes to the content tagged with the taxonomy will update the Listing Grid automatically.
Adding content manually by nodes
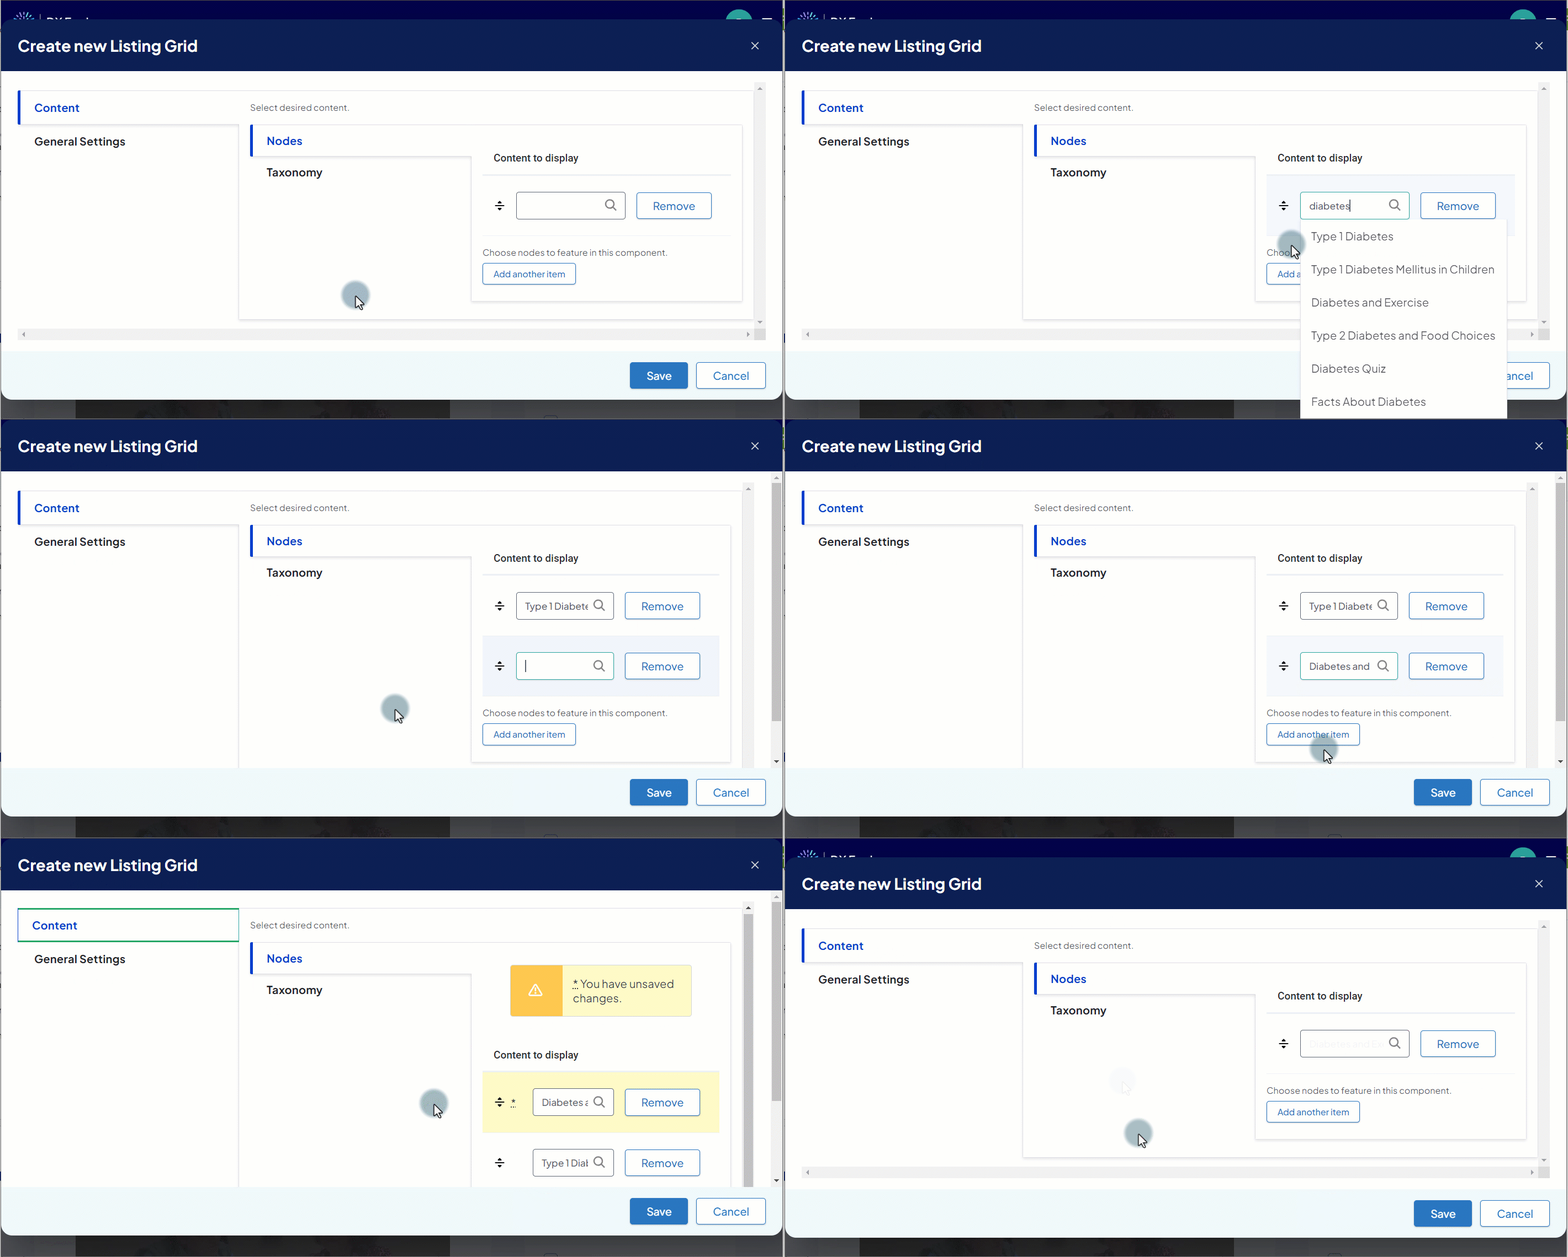
- In the Create new Listing Grid popup, select the Content tab, then the Nodes tab.
- An input box appears under Content to display.
- An input box appears under Content to display.
- Enter the title of the node to add to the Listing Grid.
- Select the node from the list of autocomplete suggestions.
- For each additional item, click Add another item and repeat steps 2-3 in the new input box that appears.
- To rearrange items, click and drag them by the arrows icon.
- To remove any item, click Remove next to the item.


