Create a site alert
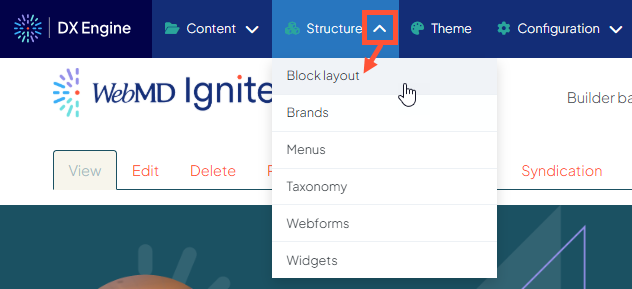
- Click the dropdown arrow next to Structure in the Toolbar, then Block layout.
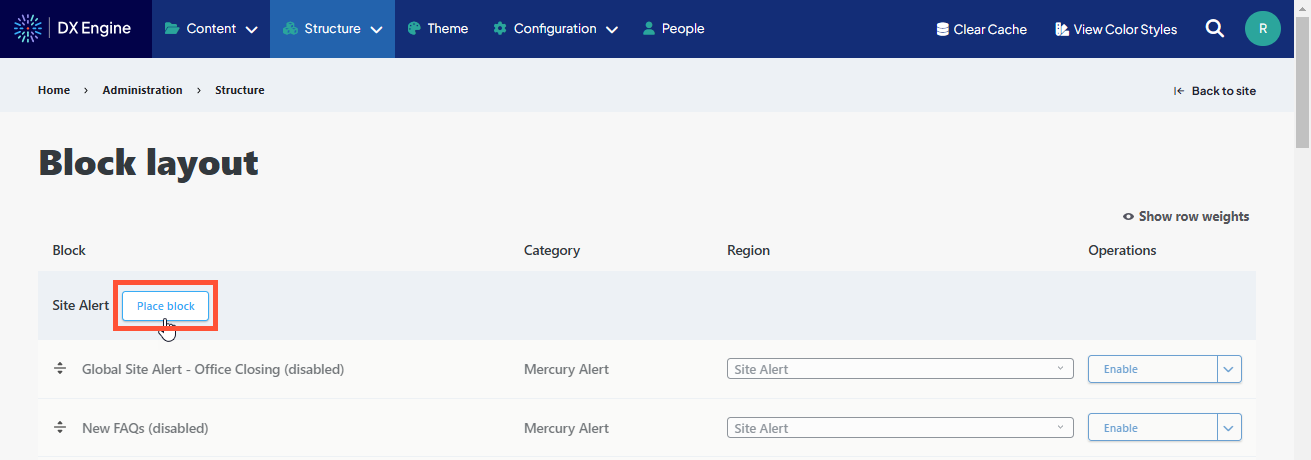
- Click Place block next to the Site Alert region.
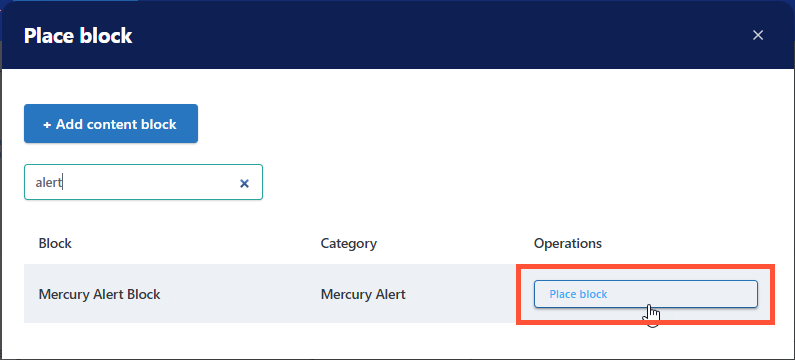
- In the Place block modal, enter "alert" in the filter box. Then click Place block next to Mercury Alert Block.
- Configure the site alert content and settings (see our Site alert reference page for descriptions of each field).
- When finished, click Save block at the bottom of the page.
The alert will immediately appear on all pages where it is configured to show.
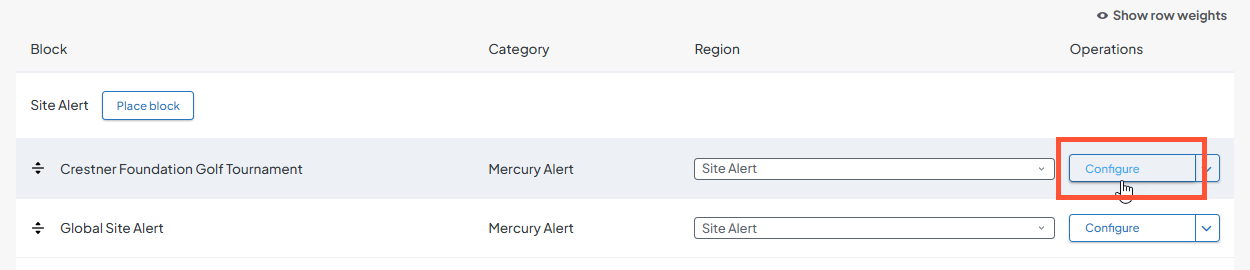
Edit a site alert
- Click the dropdown arrow next to Structure in the Toolbar, then Block layout.
- Locate the site alert block to modify.
- If the site alert is currently enabled, click the Configure button.
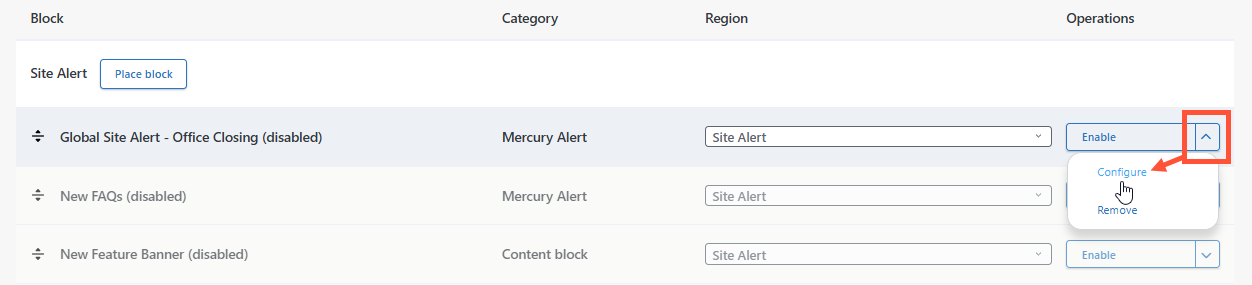
- If the site alert is currently disabled, click the dropdown arrow next to Enable, then click Configure.
- If the site alert is currently enabled, click the Configure button.
You can then edit the site alert content and settings the same way as when the alert was created.
Disable a site alert
Disabling a site alert will override Visibility settings and prevent the alert from displaying on any pages. This is useful for temporarily removing a site alert that you plan on reusing later.
To disable a site alert:
-
Click the dropdown arrow next to the Configure button, then click Disable.

- Click Clear Cache in the Toolbar to ensure that the change is propagated through your entire site.

Enable a disabled site alert
- Click Enable next to the site alert.

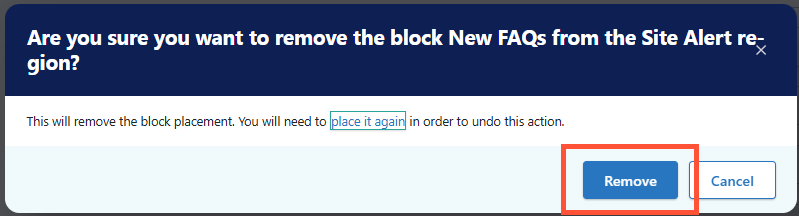
Remove a site alert
Removing a site alert will delete it from your site altogether. It will no longer appear in the list of site alerts and cannot be restored or re-enabled. If you think you may need to keep access to this alert for future use, consider disabling the alert instead.
- Click the dropdown arrow next to the Configure or Enable button, then click Remove.

- Click Remove again in the confirmation modal.